There are two ways to customize your HRAs:
Corporate-Level Customization
- Sets global defaults across all HRAs
- Managed from the Corporate View > Customization
- Ideal for organizations with standardized branding or legal language
HRA-Level Customization
- Available for each individual HRA
- Useful when service lines or regions require different branding, logos, or contact info
- Any modules locked at the corporate level cannot be edited at the HRA level
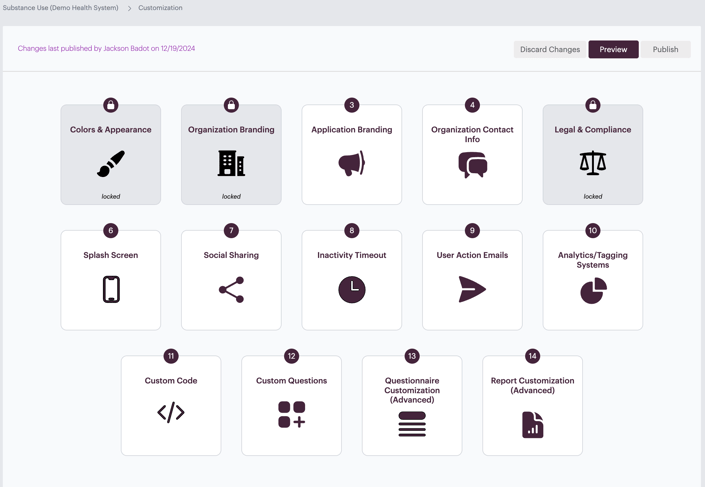
📸 (Screenshot: customization modules locked/unlocked)

Each HRA includes a set of customizable modules. Depending on your user role and access level, you can adjust:
| Module | What You Can Do |
|---|---|
| Colors & Appearance | Set primary brand color used across HRA elements |
| Organization Branding | Upload your logo and configure layout preferences |
| Application Branding | Change the HRA display name (e.g., “Heart Risk Quiz”), background image, and app logo |
| Contact Info | Enter phone numbers, links, and service line descriptions shown in emails and risk reports |
| Splash Screen | Modify intro content and logo placement on the first screen |
| User Action Emails | Customize the post-completion risk report email |
| Analytics & Tagging | Add GTM, GA4, Tealium, or custom code snippets |
| Custom Questions | Add up to 10 additional questions at the end of the HRA |
| Questionnaire Customization | Edit some question language and fields such as address or phone number |
| Report Customization | Modify the content displayed in the user’s final risk report |
📸 (Screenshot: Customization menu with key modules highlighted)